自定义顶点 UV 坐标
学习自定义顶点 UV 坐标之前,首先保证对 BufferGeometry 的顶点数据和纹理贴图有一定的理解
顶点 UV 坐标的作用
顶点 UV 坐标的作用是从纹理贴图上提取像素映射到网格模型 Mesh 的几何体表面上
浏览器控制台查看 threejs 几何体默认的 UV 坐标数据
js
const geometry = new THREE.PlaneGeometry(200, 100); //矩形平面
// const geometry = new THREE.BoxGeometry(100, 100, 100); //长方体
// const geometry = new THREE.SphereGeometry(100, 30, 30);//球体
console.log('uv', geometry.attributes.uv);
纹理贴图 UV 坐标范围
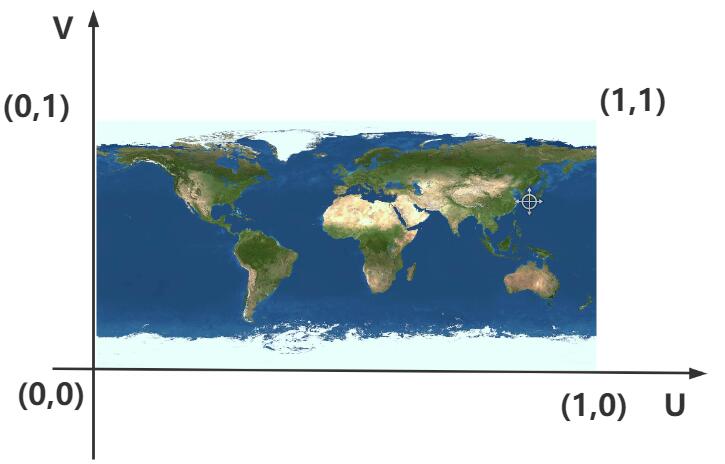
顶点 UV 坐标可以再 0~1.0 之间任意取值,纹理贴图左下角对应的 UV 坐标是 0,0,左上角对应的坐标是 1,1
自定义顶点 UVgeometry.attributes.uv
顶点 UV 坐标 geometry.attributes.uv 和顶点位置坐标 geometry.attributes.position 是一一对应的
UV 顶点坐标你可以根据需要再 0~1 之间任意设置,具体怎么设置要看你想把图片的那部分映射到 Mesh 的几何体表面上
js
/**纹理坐标0~1之间随意定义*/
const uvs = new Float32Array([
  0,
  0, //图片左下角
  1,
  0, //图片右下角
  1,
  1, //图片右上角
  0,
  1, //图片左上角
]);
// 设置几何体attributes属性的位置uv属性
geometry.attributes.uv = new THREE.BufferAttribute(uvs, 2); //2个为一组,表示一个顶点的纹理坐标
获取纹理贴图四分之一
js
const uvs = new Float32Array([0, 0, 0.5, 0, 0.5, 0.5, 0, 0.5]);完整代码
js
import * as THREE from 'three';
import { OrbitControls } from 'three/addons/controls/OrbitControls.js';
const scene = new THREE.Scene();
// 1.创建纹理加载器对象
const textureLoader = new THREE.TextureLoader();
// 2.使用load方法加载图片, 会返回一个纹理对象
const texture = textureLoader.load('./earth.jpg');
// const geometry = new THREE.BoxGeometry(50, 50, 50);
const geometry = new THREE.BufferGeometry();
const vertices = new Float32Array([
0,
0,
0, // 顶点1的坐标
160,
0,
0, // 顶点2的坐标
160,
80,
0, // 顶点3的坐标
0,
80,
0, // 顶点4的坐标
]);
const attribue = new THREE.BufferAttribute(vertices, 3);
const indexes = new Uint16Array([0, 1, 2, 0, 2, 3]);
geometry.index = new THREE.BufferAttribute(indexes, 1);
geometry.attributes.position = attribue;
const uvs = new Float32Array([
0,
0, // 顶点1的UV坐标
1,
0, // 顶点2的UV坐标
1,
1, // 顶点3的UV坐标
0,
1, // 顶点4的UV坐标
]);
geometry.attributes.uv = new THREE.BufferAttribute(uvs, 2);
const material = new THREE.MeshBasicMaterial({
// color: 0xff0000, // 纹理贴图最好不要搭配color一起设置, 会影响
map: texture, // 3.设置材质的颜色贴图, 将纹理对象(图片)作为mesh材质的贴图
});
const mesh = new THREE.Mesh(geometry, material);
scene.add(mesh);
const ambientLight = new THREE.AmbientLight(0xffffff, 1);
scene.add(ambientLight);
const camera = new THREE.PerspectiveCamera(
30,
window.innerWidth / window.innerHeight,
0.1,
1000
);
camera.position.set(500, 500, 500);
const renderer = new THREE.WebGLRenderer();
renderer.setSize(window.innerWidth, window.innerHeight);
const render = () => {
renderer.render(scene, camera);
window.requestAnimationFrame(render);
};
render();
new OrbitControls(camera, renderer.domElement);
const axesHelper = new THREE.AxesHelper(200);
scene.add(axesHelper);
document.body.appendChild(renderer.domElement);
window.onresize = () => {
renderer.setSize(window.innerWidth, window.innerHeight);
camera.aspect = window.innerWidth / window.innerHeight;
camera.updateProjectionMatrix();
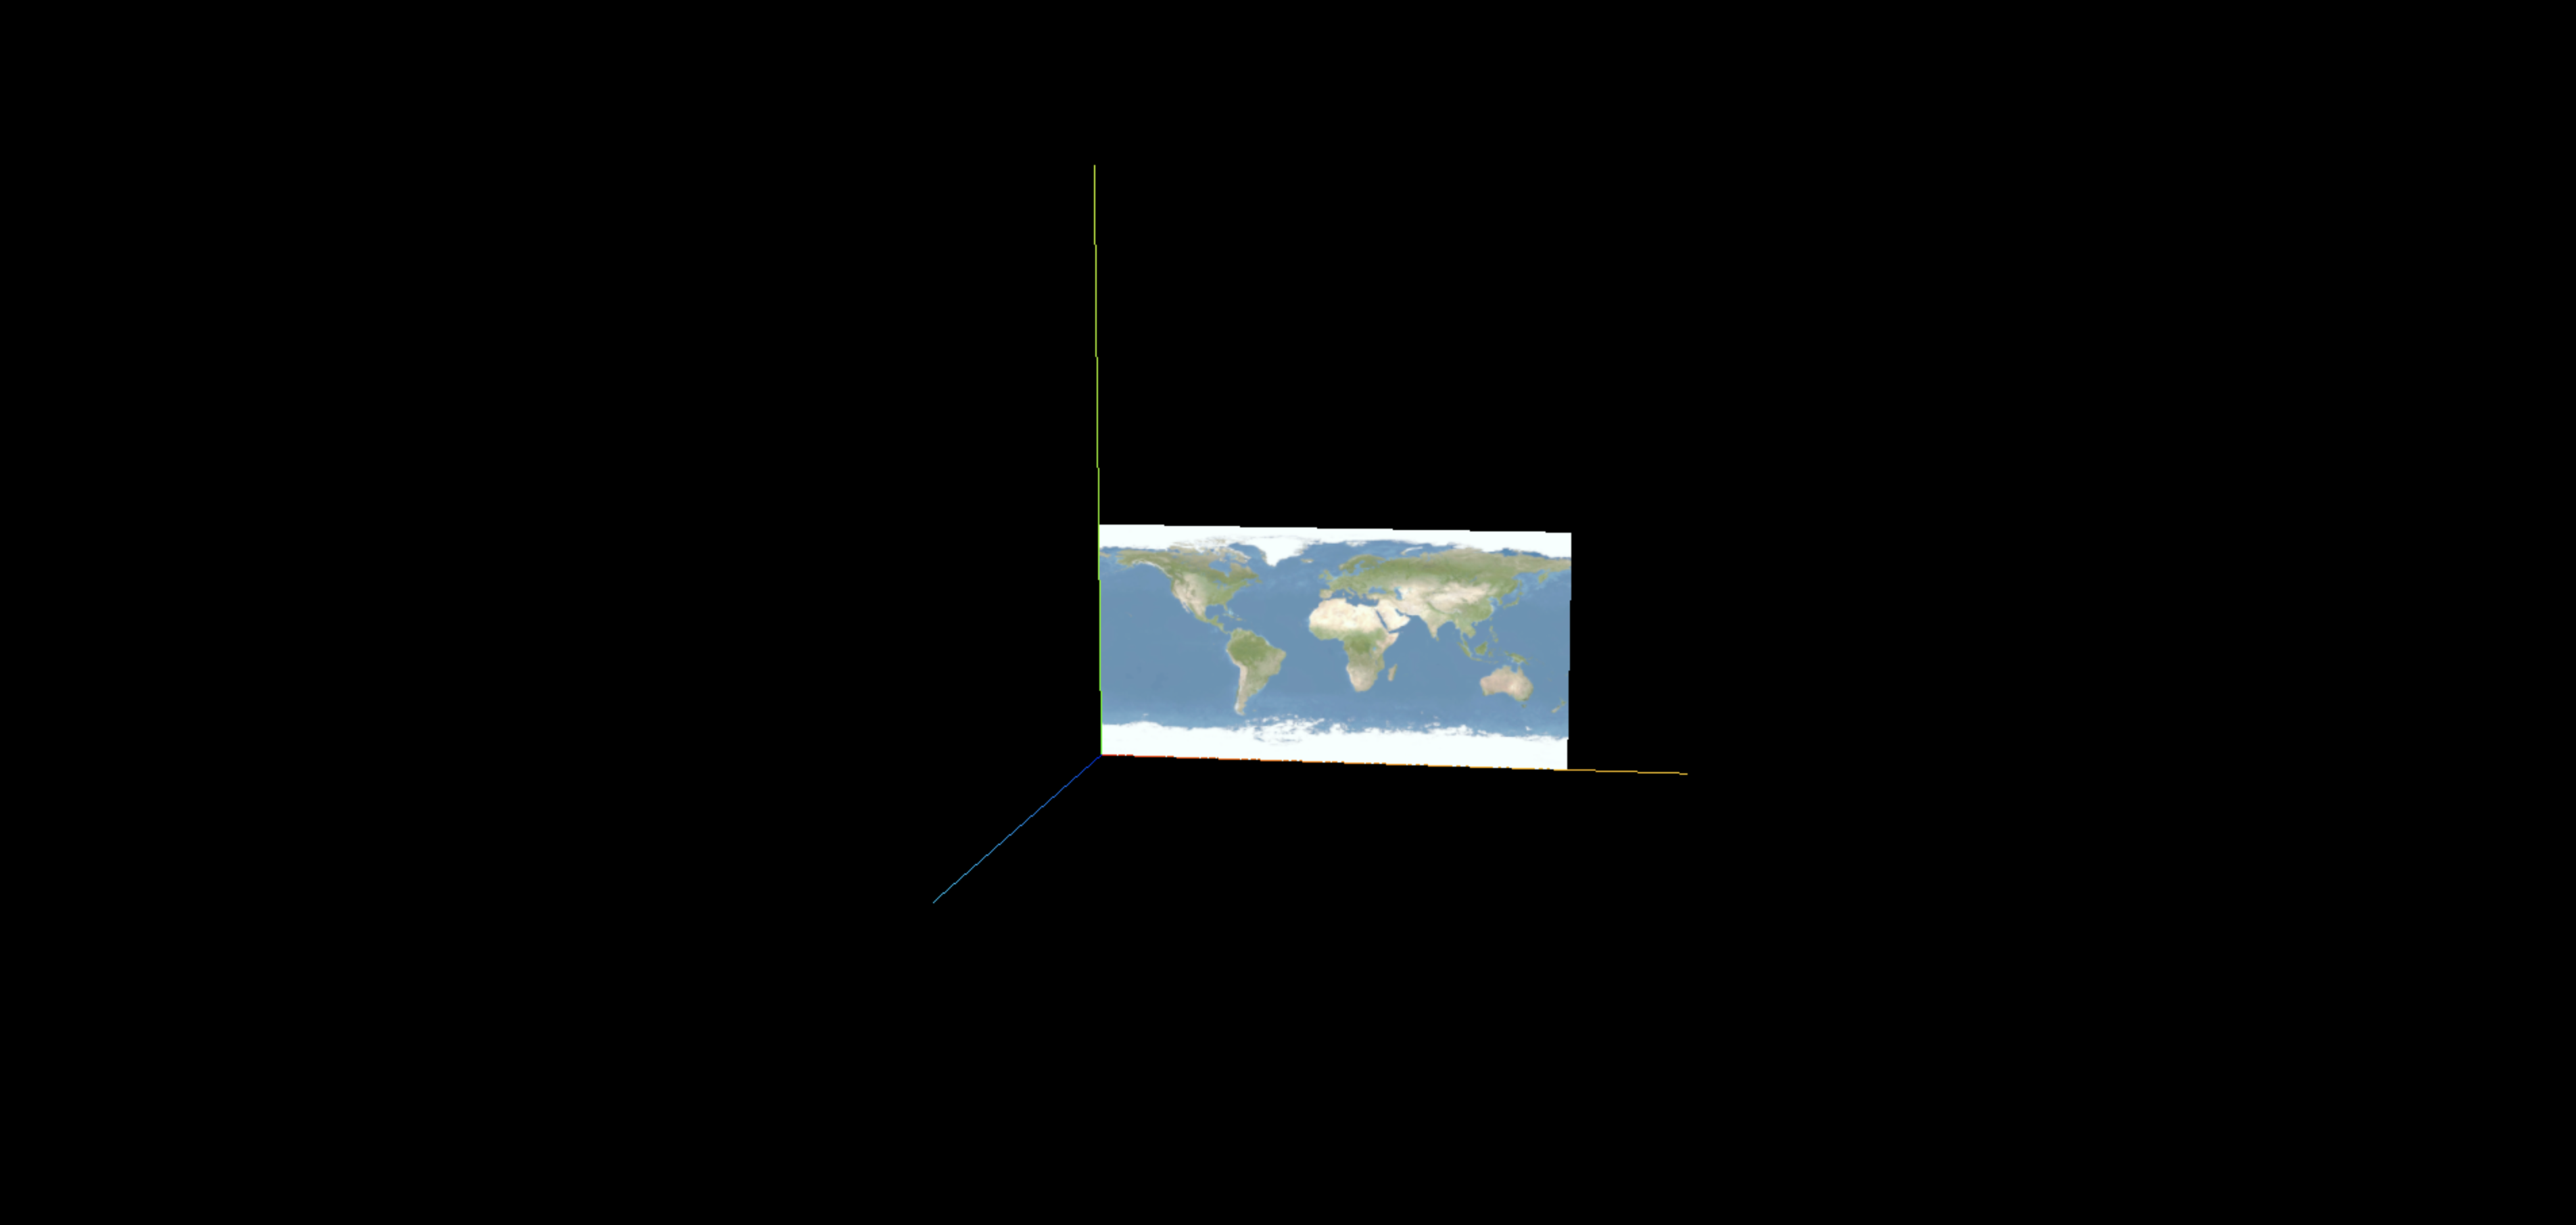
};效果